

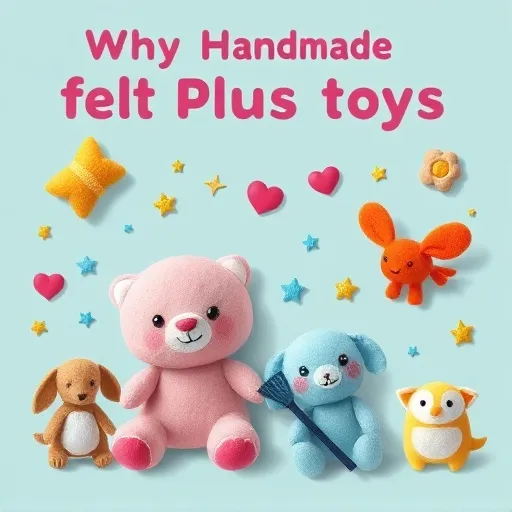
Felt plush toys risi
Why Felt Plush Toys Are Having a Moment in 2026
The crafting world has changed a lot over the past couple of years, and honestly, it's been a pretty exciting shift to watch. People are ditching their screens and craving hobbies that keep their hands busy and produce something cute and tangible. Felt plush toys sit right at that sweet spot between accessibility and creativity. You don't need a sewing machine, you don't need an expensive setup, and you definitely don't need years of experience. That's exactly why searching for an easy handmade felt plush toys tutorial has become such a popular starting point for beginners.
Industry professionals have noticed that the handmade toy market keeps growing, with search interest in DIY plush tutorials climbing steadily. According to crafting community insights, felt-based projects rank among the top three most-searched beginner crafts worldwide. That's a big deal, and it makes sense. When you find a solid easy handmade felt plush toys tutorial, you can go from zero to a finished stuffed animal in a single afternoon.
What makes felt so beginner-friendly? Unlike woven fabrics, felt doesn't fray. You can cut it into any shape and it holds together beautifully. It's thick enough to be forgiving of imperfect stitches, and it comes in every color imaginable. Plus, the texture is soft and inviting, perfect for cuddly creations. Follow any good easy handmade felt plush toys tutorial and you'll see exactly what we mean.
Must-Have Craft Supplies and Starter Materials for Your First DIY Plush Project
Before we get into the actual crafting steps, let's talk supplies. One of the best things about this hobby is how low the barrier to entry really is. Here's your complete starter list for any easy handmade felt plush toys tutorial:
- Felt sheets or felt yardage – Look for wool blend or acrylic felt. Wool blend is softer and more durable, while acrylic is budget-friendly and comes in a wider color range. For beginners, acrylic is a great starting point.
- Embroidery floss – This is what you'll use for stitching. It's stronger than regular thread and comes in gorgeous colors. Match or contrast with your felt for different looks.
- Hand-sewing needles – You'll want a pack with various sizes. Embroidery needles with slightly larger eyes work best for floss.
- Sharp fabric scissors – Keep these separate from your paper scissors. Sharp blades make all the difference when cutting felt cleanly.
- Polyester fiberfill stuffing – This is what gives your plushie its squish. You can find it at any craft supply store or online marketplace.
- Pins or sewing clips – Small sewing clips are fantastic for holding felt pieces together without leaving holes.
- Pattern paper and a pencil – For drawing and cutting out your template.
- Optional: fabric marker or chalk – For tracing patterns onto felt.
- Optional: small embellishments – Safety eyes, tiny buttons, or felt scraps for details.
A quick note on safety: if you're making plushies for young children, always use embroidered features instead of small plastic parts, and make sure everything is securely attached. Safety first, cuteness second. Any responsible easy handmade felt plush toys tutorial should remind you of this.
Choosing a Simple Plush Design and Beginner-Friendly Patterns for Felt Animals
When it comes to easy handmade felt plush toys, simpler is genuinely better for your first attempt. You want a design with a clear silhouette and minimal small pieces. Here are some fantastic options:
- Round animal faces – A basic circle or oval body with tiny ears is incredibly forgiving. Think simple bear or cat shapes.
- Cloud or star plushies – These have straightforward outlines and look charming with minimal detail.
- Miniature fruit shapes – A little felt strawberry or pear is a great confidence builder.
- Simple blob creatures – The internet has fallen in love with minimalist blob-style characters, and they're perfect for beginners.
Whatever design you choose, keep your first project small. A plushie that fits in the palm of your hand is ideal. You'll finish it quickly, feel accomplished, and be eager to make more. That momentum is exactly what a good easy handmade felt plush toys tutorial is designed to give you.
Step-by-Step Sewing Instructions: Your Complete Easy Handmade Felt Plush Toys Tutorial for Hand-Stitching
Alright, here's where the magic happens. This easy handmade felt plush toys tutorial breaks the process into clear, manageable steps. Follow along and you'll have a finished plushie in about two to three hours.
Step 1: Design and cut your pattern. Start by sketching your design on a piece of paper. Remember, you'll need two mirrored pieces for the front and back of your plushie. Cut out your paper template, place it on your felt, and trace around it using a fabric marker or chalk. Sharp scissors are your best friend here. Take your time and try to make your cuts as smooth as possible.
Step 2: Plan your face and details. Before you sew anything together, decide on your plushie's face. Using embroidery floss, you can stitch simple eyes, a tiny nose, a little smile, or even blush marks. Do this on one of the flat pieces before assembly. It's much easier to embroider on a flat surface than a stuffed one. For beginners, two small French knots or straight stitches for eyes and a tiny V-shape for a nose work great. If you're using safety eyes, install them now before sewing the pieces together.
Step 3: Pin and prepare for stitching. Place your two felt pieces together with the right sides facing outward. Yes, felt plushies are typically sewn with the visible side out. Use sewing clips or pins to hold the layers together around the edges. If you're adding small ears or limbs, tuck them between the two layers at the appropriate spots and clip them in place.
Step 4: Stitch around the edge. Thread your needle with embroidery floss. For felt plushies, a blanket stitch or whip stitch works beautifully. The blanket stitch gives a decorative, finished edge, while the whip stitch is faster and simpler. Begin stitching around the perimeter, keeping your stitches relatively even. Stop about an inch or two before you complete the circle. This gap is your stuffing opening. Pro tip: don't pull your stitches too tight, or you'll distort the shape.
Step 5: Stuff and close. Gently stuff your plushie with polyester fiberfill. Start with small pieces and push them into the corners and edges first. Use the back of a pencil or a dedicated stuffing tool to reach those tricky spots. Once you're happy with the firmness, stitch the opening closed and bury the thread tail inside the plushie.
Step 6: Final touches. Give your plushie a gentle squeeze and shape it with your fingers. If you want to add extra details like a tiny bow, a stitched heart, or decorative trim, now's the time. Congratulations, you've just completed your first handmade felt plush toy, and you barely needed more than a single easy handmade felt plush toys tutorial to get there.
Cutting Techniques, Stitching Advice, and Stuffing Secrets from Seasoned Makers
We've gathered insights from experienced crafters to help you level up. These tips apply whether you're making your first toy or your fiftieth, and they pair perfectly with any easy handmade felt plush toys tutorial you follow.
- Always cut felt with sharp, dedicated fabric scissors. Dull blades cause ragged edges.
- Use embroidery scissors for small, intricate shapes and details.
- Fold your felt in half when cutting symmetrical pieces to ensure both sides match.
- Use thread conditioner or beeswax on your embroidery floss to prevent tangling and fraying.
- Keep your stitch length consistent. This separates a polished plushie from a messy one.
- Don't be afraid to use a contrasting thread color for a charming, handcrafted look.
- Less is more when you start stuffing. You can always add more fiberfill, but it's harder to remove.
- Use small, loose tufts of fiberfill rather than large clumps for a smoother finish.
- For weighted plushies, some makers add a small pouch of plastic pellets to the base for stability.
Common Beginner Mistakes in Felt Crafts and How to Avoid Them
Learning from others' experiences is one of the smartest ways to improve quickly. Here are the pitfalls that trip up most beginners working through their first easy handmade felt plush toys tutorial:
- Using too much stuffing. Overstuffed plushies look lumpy and have strained seams. Aim for medium firmness.
- Cutting pieces too small. Remember that seam allowances matter. Cut slightly larger than you think you need.
- Rushing the face embroidery. The face is what gives your plushie personality. Sketch placement before committing to stitches.
- Skipping the pinning step. It's tempting to just hold pieces together, but clipping ensures even edges and symmetrical results.
Advanced Felt Techniques, Appliqué Detailing, and Gift-Making Ideas to Grow Your Skills
Once you've mastered the basic easy handmade felt plush toys tutorial, the creative possibilities are genuinely endless. Here are some directions to explore as you grow more confident:
- Appliqué detailing – Layer contrasting felt shapes onto your plushie for added visual interest.
- Sculpted faces – Use strategic stitches to create cheek definition or eye sockets.
- Mixed materials – Combine felt with cotton fabric, faux fur, or yarn hair for textured creations.
- Miniature accessories – Tiny felt hats, scarves, or bags turn a simple plushie into a character.
- Pattern scaling – Take a design you love and scale it up or down to create families of plushies.
Handmade felt plush toys make heartfelt gifts for birthdays, baby showers, and holidays. There's something deeply personal about giving someone a toy you made with your own hands. Many crafters also find community through local crafting groups, online forums, and workshops, where they swap patterns, techniques, and encouragement. Looking ahead, the handmade toy trend shows no signs of slowing down. With a growing emphasis on sustainable, personalized, and screen-free activities, felt plushie making is perfectly positioned as a hobby that brings joy to both makers and recipients. If you've been hunting for the right easy handmade felt plush toys tutorial to finally dive in, 2026 is your year.